
Back to Part 3 |
|
|
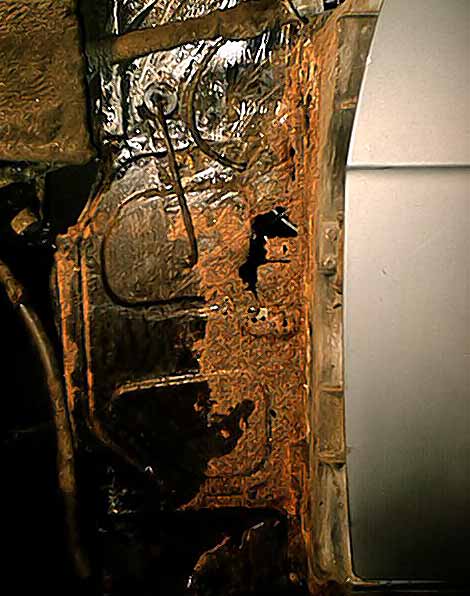
With the left front wing remove more rust was found, as expected... The side of the passenger compartment just in front of the A-post was worse than on the other side, everything else looks better. But everything is relative, there is rust to repair, no doubt about it! |
|
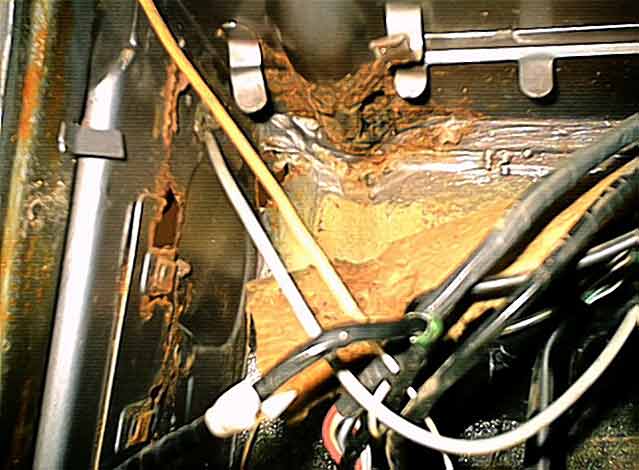
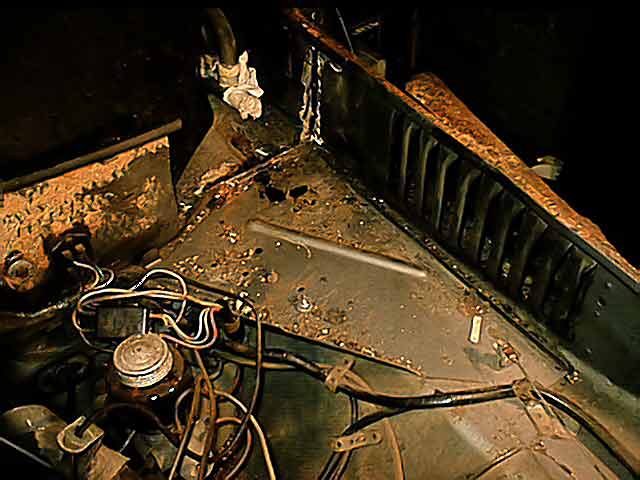
Oops, this doesn't look good. This is the top of the bulkhead, just under the dashboard on the left side. On the left you can see the inside of the A-post, with the rust from the last picture. The rusty place on top of the picture is the drainage from ventilation system, with the draining hose. Rust here is unfortunately not uncommon, but very difficult to repair in a satisfactory way. To prevent rust here it is very good practice to remove the ventilation. cover and oil this area, preferably every year. |

|
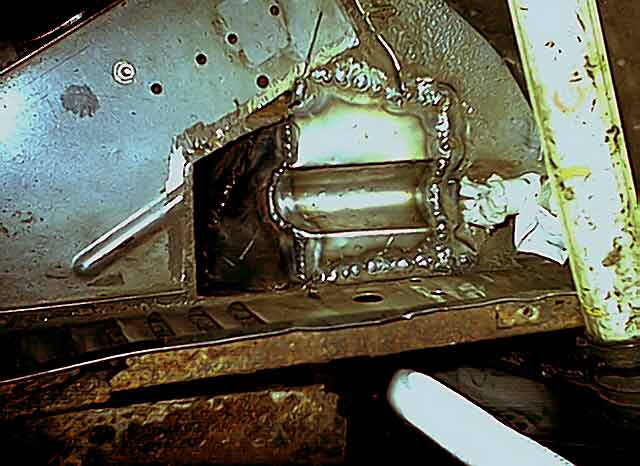
The side chassis member is quite rusty, and here I have cut away the lower parts of the inner side. I start here to make the car as strong as possible before fixing the A-post. |
|
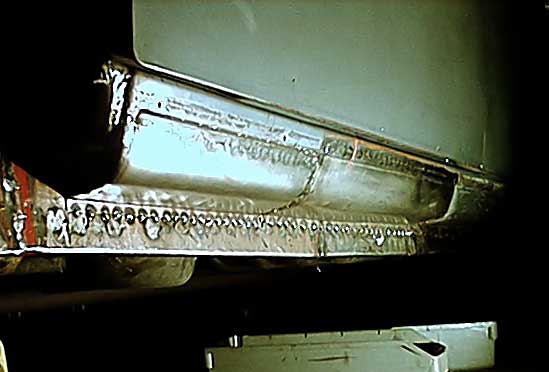
Inner side of chassis member ready and solid. |
|
The chassis member has been closed in front, but I leave the rest to later. There is an old patch on the sill I want change, at which point I will finish the inside also. |
|
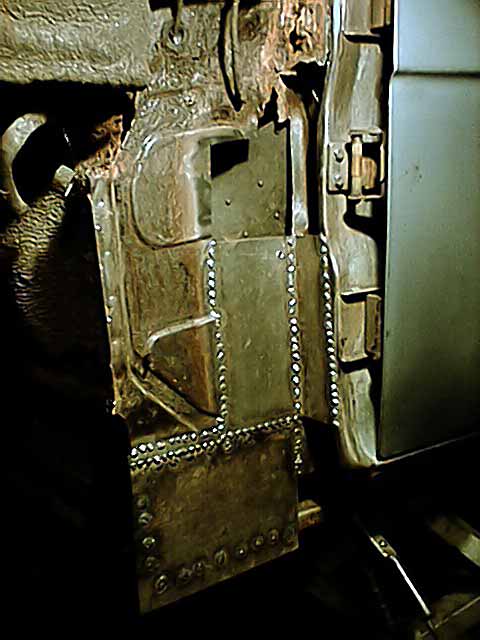
Working my way up the A-post. |
|
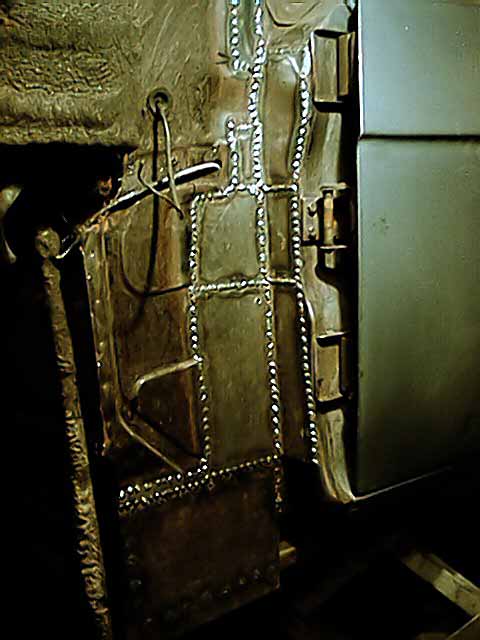
A-post done. |
|
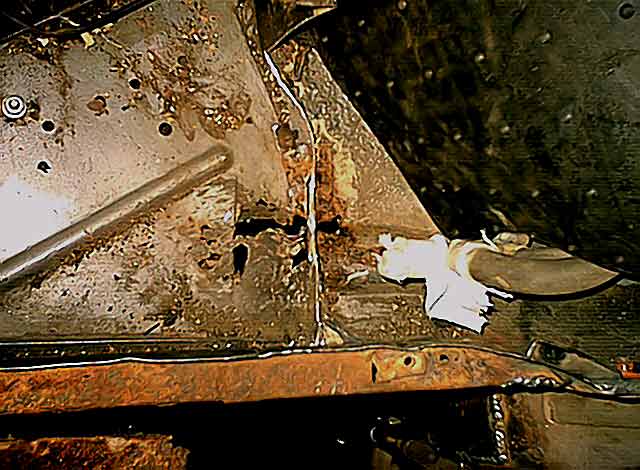
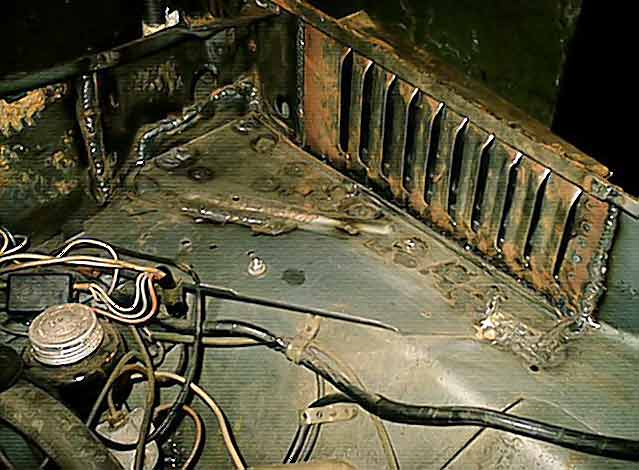
Attempting to fix the rust around the ventilation system drain I have removed a section of the bulkhead, which was quite perfect. Anyway, it was necessary to get access to this tricky section. |
|
On this detail picture the beginning of the drain is visible just left of the heater control valve. But it doesn't really look that bad... |

|
But with part of the triangular support plate the (w)hole becomes obvious. |
|
With new metal in place it's easier to see the drain. |
|
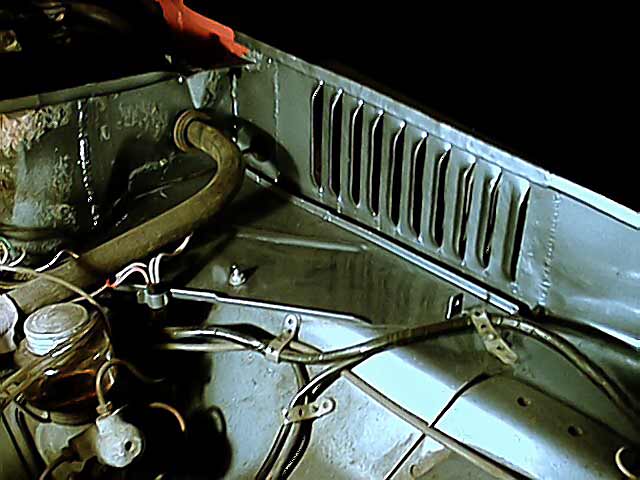
The difficult corner is finally done, including new ventilation slats. Some grinding of the welds and coat of paint nobody will know I have been here. |
|
As predicted, with some paint it almost looks like new! |
|
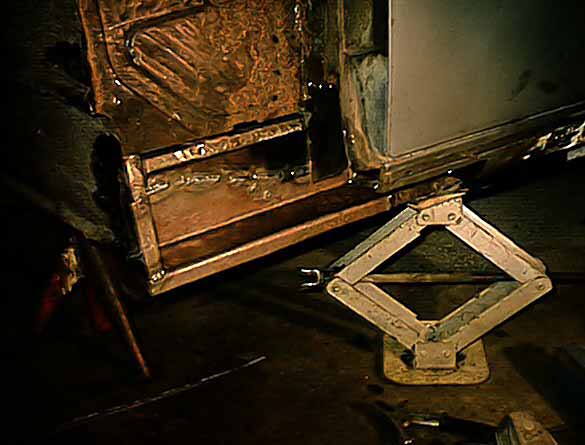
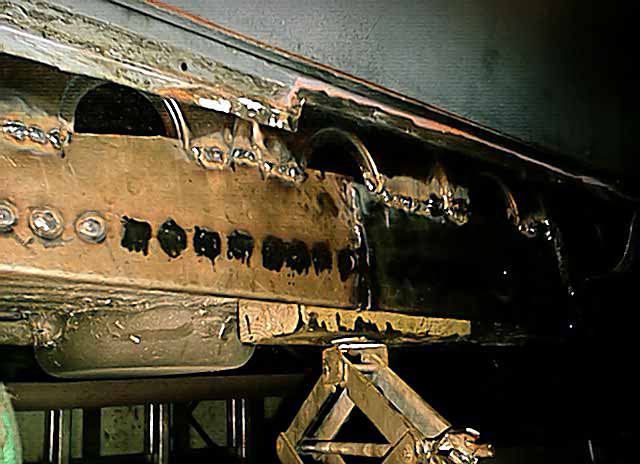
The old patch on the sill has been removed and the lower, rusty, parts has been changed. Maybe not the most beautiful repair, but it's inside the sill so who cares as long it will hold the car together... |
|
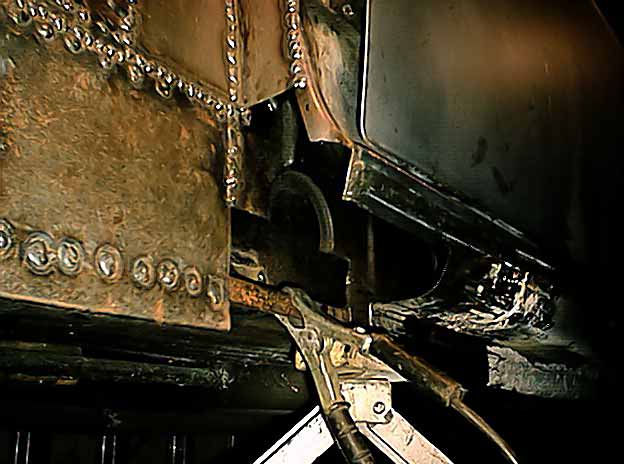
The lower parts of the sill, from the chrome strip and down, has been replaced. As long as the rust is located below the doors it is fairly easy to make a new sill from scratch. |

|
Like on the other side, and on many R16's, the front of the inner wing has rusted. |
To Part 5 |
Last revision 2003-02-13